How to set up Stripe on your Dirigible Website.
First things first, what is Stripe?
Stripe is Dirigible Studio’s preferred payment processor. It’s a great alternative to Paypal, Square, and other online payment methods for small businesses.
Let’s walk you through setting up your own Stripe account.
Before you start, you’ll need your:
Tax ID Number or SSN
Bank account information with routing number
We like Stripe because it’s

Easy To Use
It’s a snap for our clients, their customers and for our developers

Robust & Reliable
Stripe has a ton of features, is constantly improving and is extremely reliable.

Competitive Pricing
For many businesses, Stripe makes a lot of sense. For smaller volumes and those who are just starting out, the rates are very competitive.
Create your Stripe account
Start by navigating to the Stripe Signup Page, located at: https://dashboard.stripe.com/register
Enter your business or organization email address, your full name, and your country. You’ll also create a password at this step. Since Stripe is processing financial information, be sure to create a secure password that you do not use for any other websites or applications. Then, click the Create Account button.
Get Started with Stripe
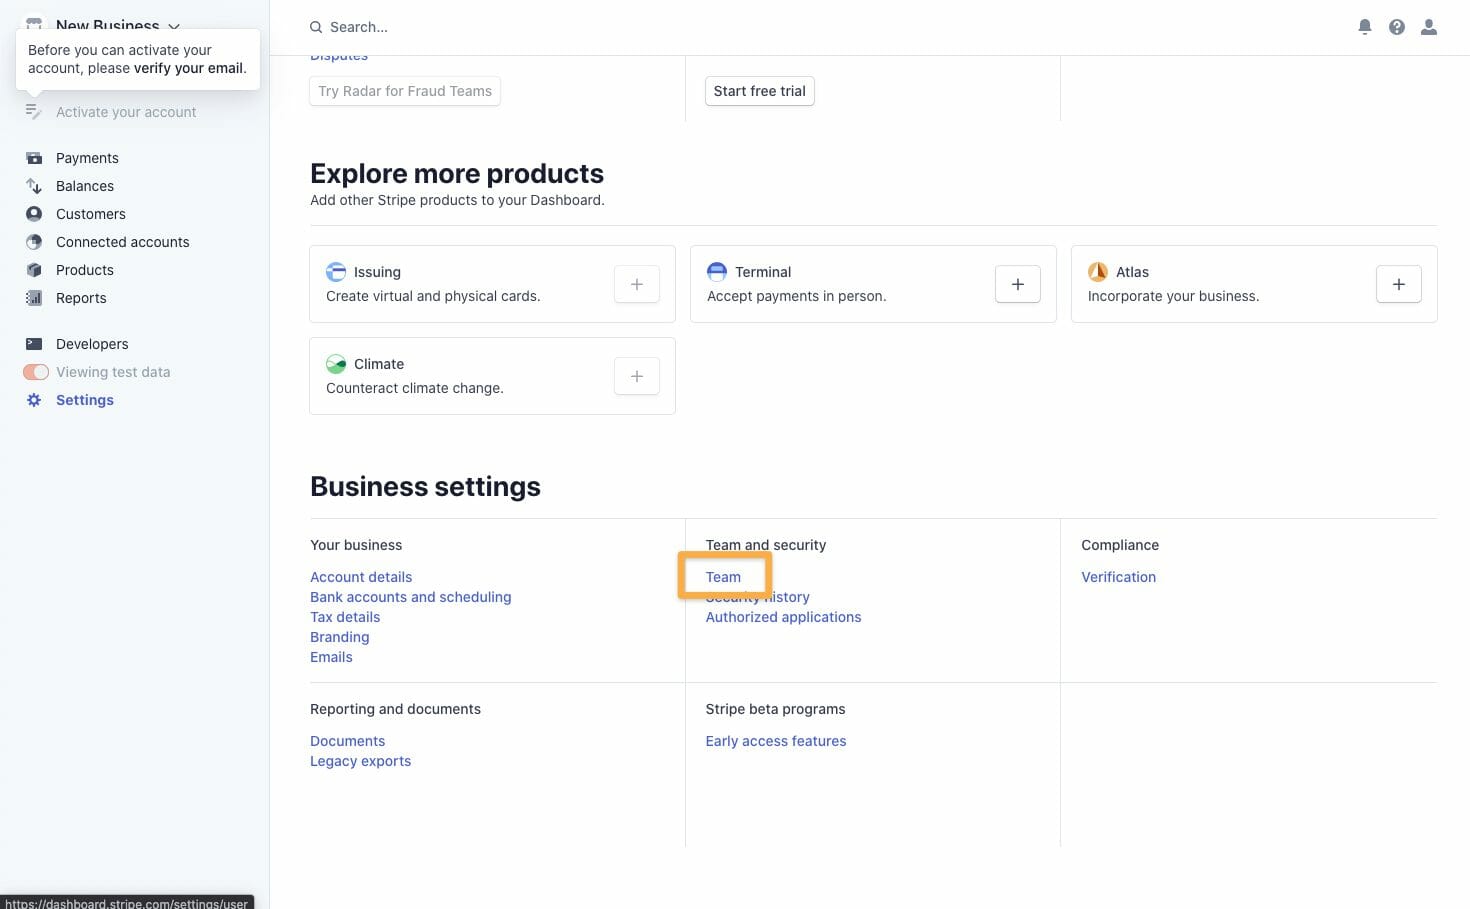
From there, you’ll be taken to the Dashboard for your Stripe account. Click on the ⚙ Settings menu item on the lower left-hand side of the screen.
Set up access for Dirigible
Our developers will need access to your API keys. You can add us to your account by choosing Team under Team and Security. A modal window will pop up. Please enter the following information:
- Email address: support@dirigiblestudio.com
- Choose the role of Developer
- Click Invite
Please note, we will not have access to any of your financial data. You can then verify who is on your team, and add other team members if needed.
Set up your Stripe Account Details
From the ⚙ Settings, go to the Your Business section and choose Account Details.
Add or Update the Following Information
- Your Account Name
- Your Country
- Verify Your Phone Number
- And Set Your Timezone

Then, Scroll down a bit 👇
And add your Business Information
- Your Business Address
- Your Statement Descriptor
- Your Shortened Descriptor
- The link to your Dirigible Website
- The link to your Support Policies page on your Dirigible Website
- The link to your Privacy Policy page on your Dirigible Website
- Click Save
Now, on to your banking information
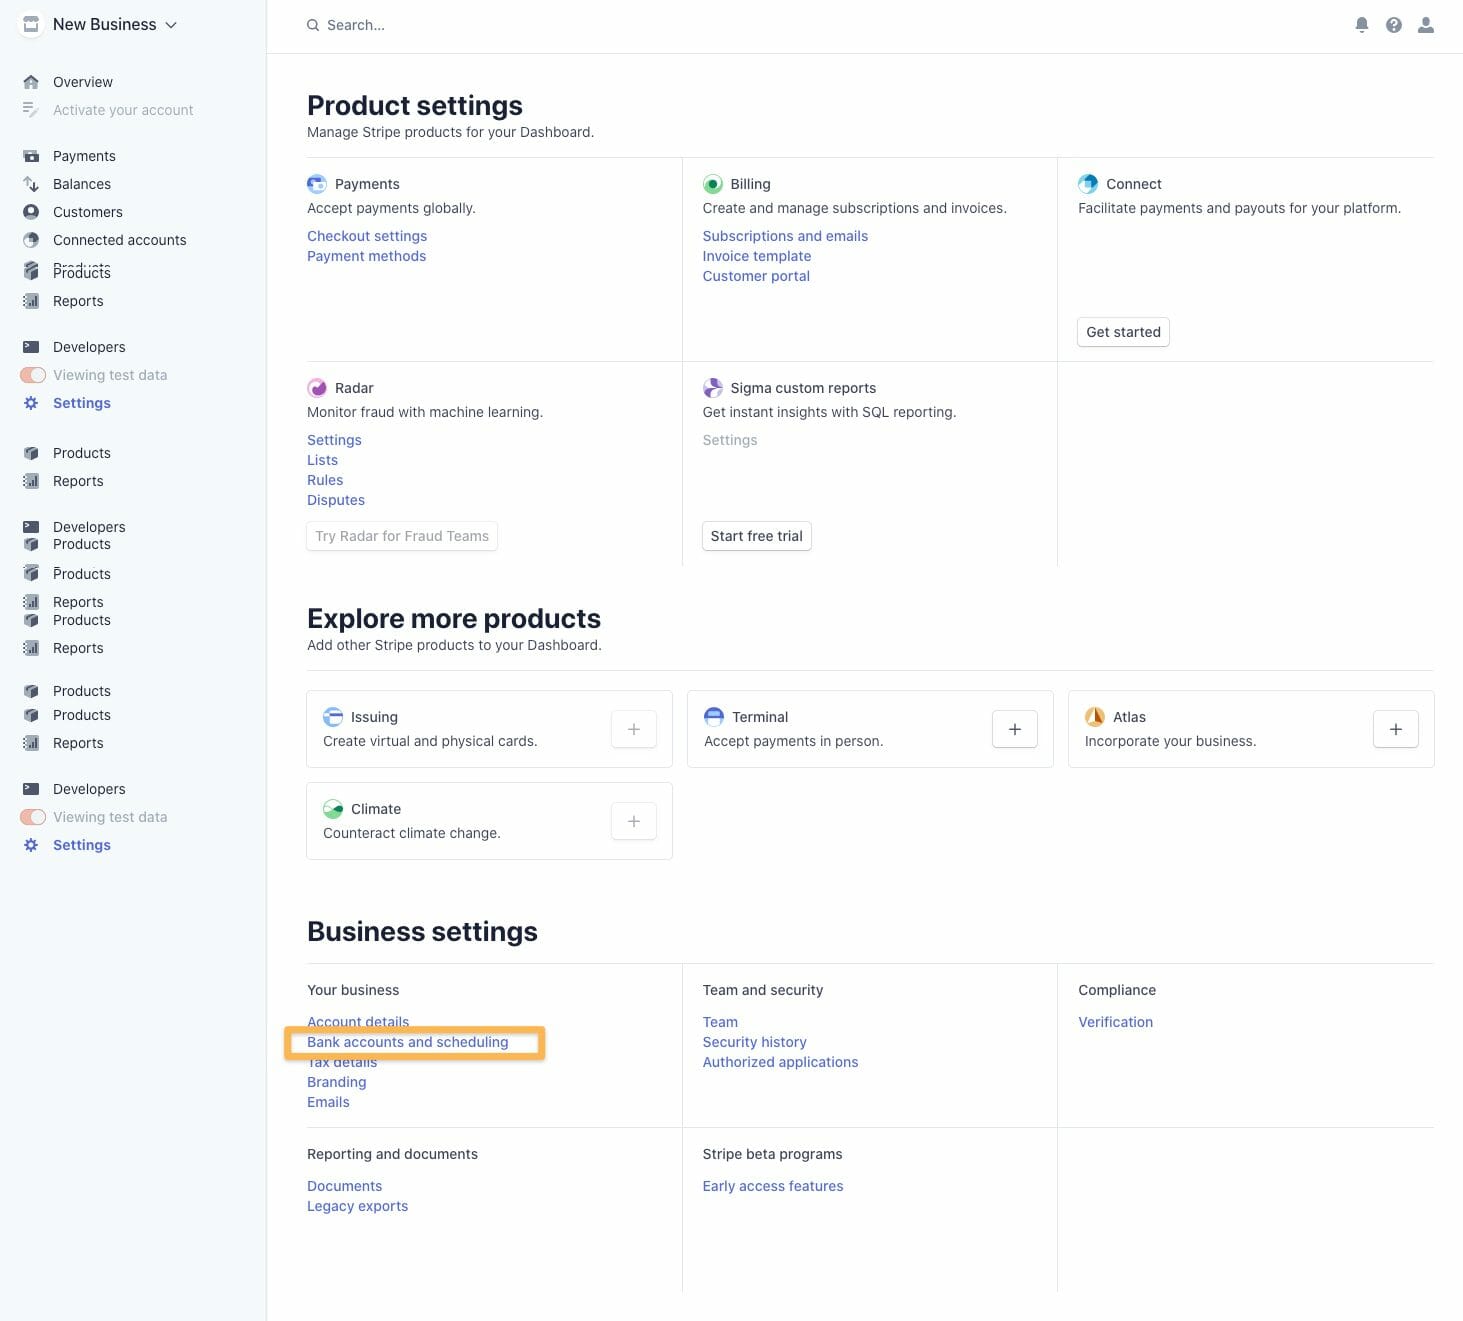
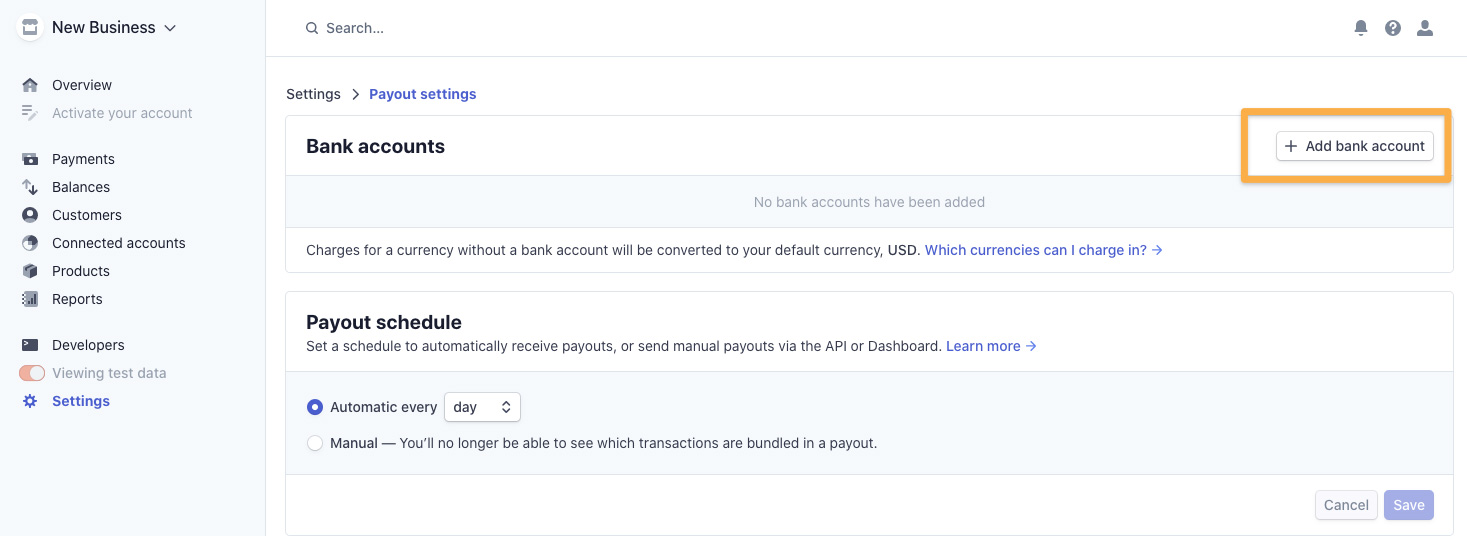
You will need to set up your banking information if you would like Stripe to deposit money into your bank account. From the ⚙ Settings, go to the Your Business section and choose Bank Accounts and Scheduling
Enter Your Bank Account Information
- Account Holder Name
- Routing Number
This is available on your bank’s website or on the bottom of your checks - Bank Account Number
- Confirm Your Account Number
- Click Save
- You’ll be returned to the Bank Accounts and Scheduling Screen, where you can change your payout schedule if desired, and then click Save.
Next up, your tax information
(We are almost done, I promise!)
From the ⚙ Settings, go to the Your Business section and choose Tax Details.
Enter your Tax Information
- Select your Business Type
- Enter your Legal Business Name
- Enter your Tax ID Number
- Click Update
Upload your Logotype, logomark and set your colors
- Upload your Logomark or Brand Icon—if you have a favicon, this would work too!
- Upload your Logo or Logotype—this is usually your horizontal logo or just the words in your logo.
- Enter your primary brand hex color
- Enter your secondary or accent brand hex color
- Click Update
That’s it!
You’re Done!
Doesn’t it feel good to tick one more thing off your to-do list?


